Before we begin, you may want to make sure you're running AWS Amplify CLI version 4.30.0 or later. Some steps have slightly changed from older versions.
If you need to update run npm upgrade -g @aws-amplify/cli in your terminal.
Adding Hosting
Now we're ready to begin deploying. Using the Amplfiy CLI, the same way we did when adding our other resources, let's cd into our project in our terminal and run amplify add hosting. You'll then be run through the following steps:
Select the plugin module to execute: Hosting with Amplify Console
Choose a type: Continuous deployment (this will auto-deploy our application when we commit changes)
Attaching Our Repository
From here we'll be kicked out to the AWS Console to select and attach our deployment to our Git repository.
Select the Git provider your app is using, mine is using GitHub, then click "Connect Branch"
There is a "Deploy without Git provider" option if your application isn't using Git. Just know your path may stray from the tutorial a bit.
If AWS doesn't have access to your Git provider you'll be walked through the process to grant AWS the access it needs to continue.
Next select your project repository
Then the branch you'd like to be deployed then click next.
Configuring Our Build
Now we need to configure our build.
Select your backend environment. If you've been following along with this lesson, we've been working with the "dev" environment.
For our build settings config, we'll want to change the frontend artifact for baseDirectory from
/to/dist/. You may not be able to edit this at this stage, I wasn't, and that's okay you can also edit this once we're finished within your deployment's build settings.Within "Advanced settings" you'll find the environment variables should you need to define any.
Everything else should be correct, so we can click next.
AWS will then ask us to review our deployment. Go ahead and review your configuration then click save and deploy.
You may get a notification from your Git provider that a new SSH key was added for your repository. This is normal.
Once you click save and deploy you'll be taken to your application deployment in AWS. You can click into the app and click the build tab to follow along with the deployment if you'd like. Otherwise, just leave this be while it does what it needs.
You'll also see our deployment was given a unique amplifyapp subdomain. You can click into this to either see a parked page while your app deploys or your application once it finishes deployment.
At this point, you can return back to your terminal and hit enter to confirm your repository is setup.
Editing Your Build Settings
If, like me, you couldn't edit your build settings when configuring your build, you can do so now. Inside your application's settings in the AWS Console, go to the build settings side nav item.
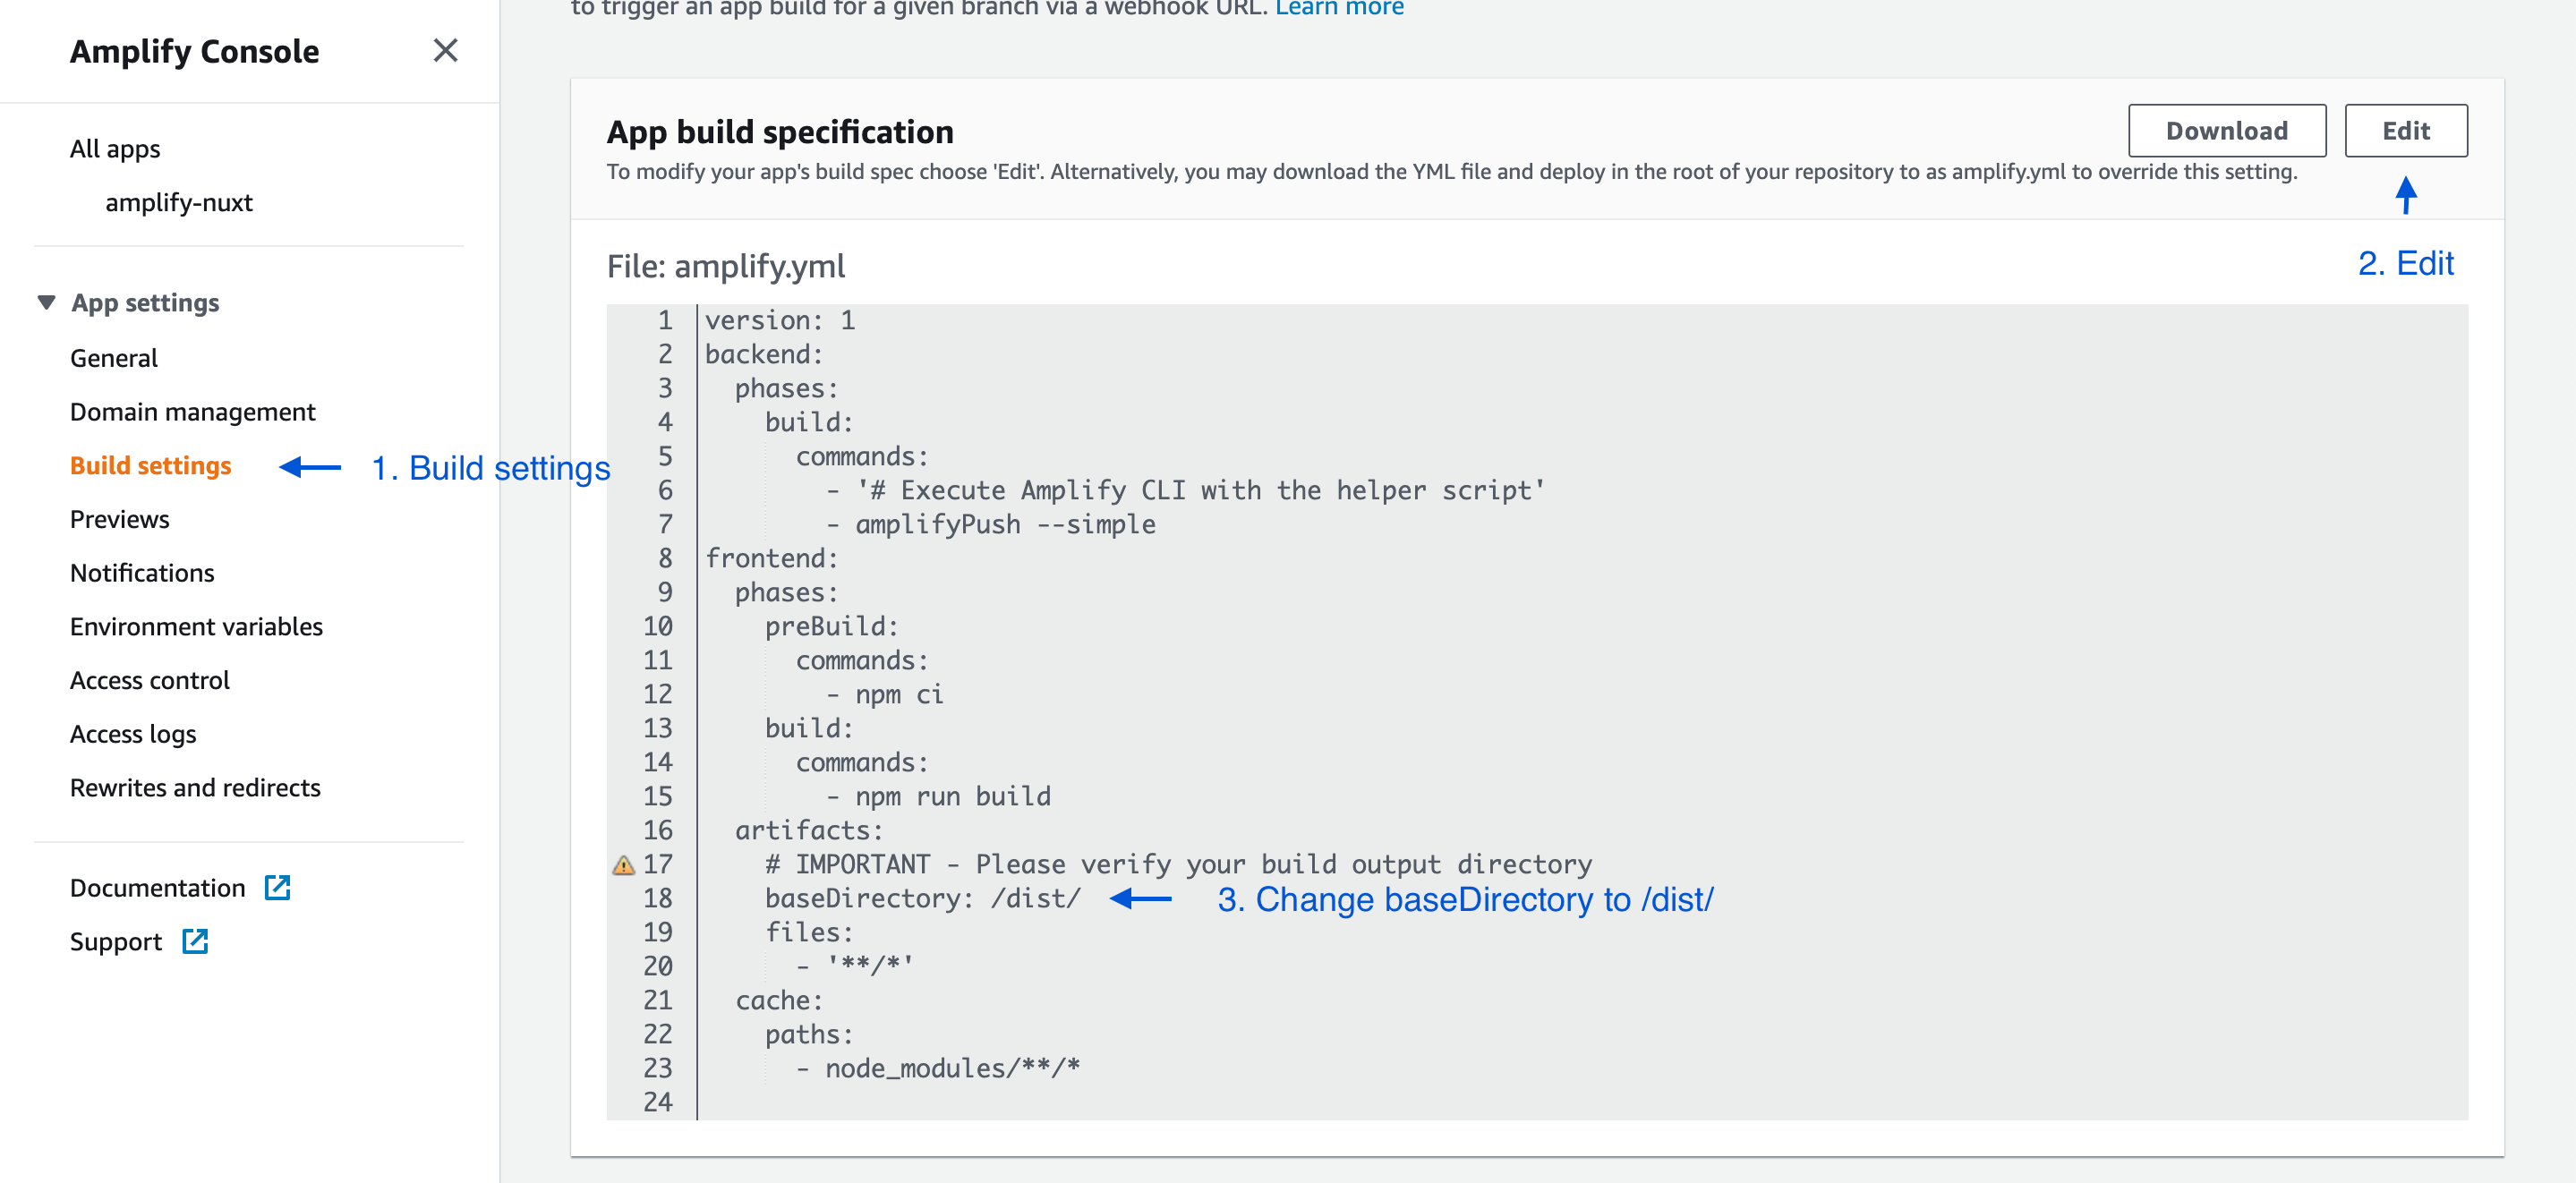 Under "App build specification" click edit, and edit line 18, from
 baseDirectory: / to baseDirectory: /dist/.
Return back to your application under "All apps" in the side nav. Click into your Frontend deployment (probably named master), then in the top-right corner click "Redeploy this version".
Join The Discussion! (2 Comments)
Please sign in or sign up for free to join in on the dicussion.
mcanvar
Please sign in or sign up for free to reply
tomgobich
Please sign in or sign up for free to reply